Wednesday, October 30, 2013

Staple Dresses and Classes

Whew, things have been busy around here!  I have a really neat stashbusting project to show you, I just haven't gotten it fully completed yet. In the meantime I have some exciting news! I'm teaching two classes in November! You can find the details about half way down the page, here. Or you can just email me, emsewcrazyatyahoodotcom.


The first class will be on November 8th and we'll be making Staple Dresses. I have had people requesting to learn to make clothing and I thought the Staple dress is a great place to start since it works with most fabrics and there is not a lot of fitting involved. This gives the beginning sewist a chance to get familiar with sewing terms, taking accurate measurements, cutting, and using the sewing machine and other basic techniques while still ending up with a wearable garment at the end.

To test the pattern I made three.

First was my "lace" version from an old heavy crochet tablecloth I've had for forever! I cut a small and had to take more out of the center front and back so the pieces would fit on my crocheted piece. Thankfully it had a lot of stretch so it fits nice and curvacious as a sheath dress. As soon as I cut the pieces I serged and basted around all the edges so it would not unravel. I also hand stitched the hem, sleeves and neckline for an invisible front finish.
Pretty "fabric" with more stretch than expected. This is as close to a halloween costume as I'll probably come.
Tested the fit over my pink Tiramisu.

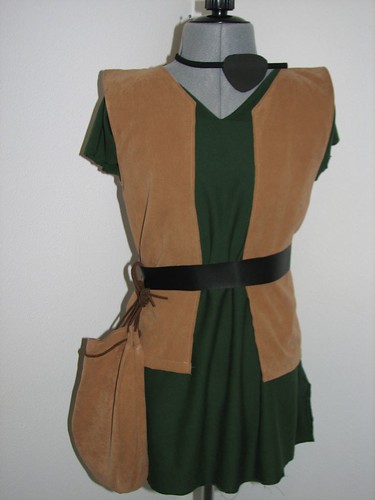
Second, I tried to follow the directions as written.  I only cut a size smaller than my measurements (because I was worried about it being too big) and colorblocked the top with a piece of pink I have been loving and wondering what to use as. April did a good job drafting this pattern. The measurements are true to size in a woven and this is a bit tight in the back and the sleeves bite into my arms when I lean forward to work. Not enough to restrict movement just enough to make it slightly uncomfortable. Next time I'll follow the sizing. I should have trusted that an independent designer would draft more accurately than the Big 4 patterns.
I marked the shirring after I had made the dress/top. 
I should mention I'm almost 5' 10" and I added an inch, inch and a half, to the waist area on the shorten/lengthen line. It still ends several inches above my knee so I'll probably add another inch to the waist area and a couple inches to the hem so it will hit me at the knee for a more personally flattering length. It's important to add length in both places otherwise the pockets will end up in your armpits or be in the way of your waist shirring.

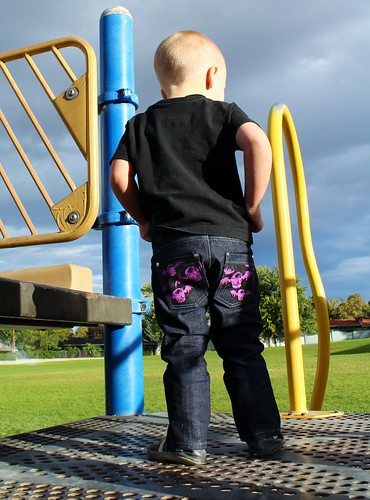
Third, I decided to try it in a medium and in an actual knit. I thought this fabric would look lovely as a long dress plus it would allow me to wear it right away since it is already getting chilly here.

This plummy color seemed to evoke lovely autumn days when the leaves fall gently from trees and the temperature slowly drops instead of a raging icy blizzard that freezes everything in sight.
Imagination V. Reality
Tree source
 ANYways, back to construction details,
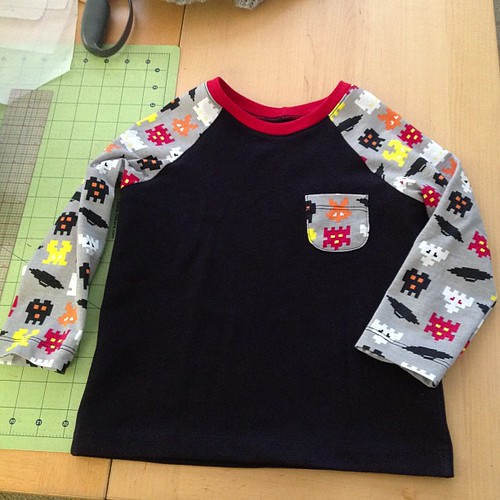
I cut the top half of the pattern and free cut the skirt portions down the length of my fabric. I sewed the shoulder seams then test fitted to see where to place the pockets and the elastic casing I decided on instead of the shirring to give me a slouchy top design.
I used Cake's method of iron on interfacing to stabilize the knit edge for the cotton pocket bags. Understitching is also an important step not worth skipping.
Then I finished the dress with knit bands stitched to the inside.

Well, that was a mouthful! Any questions, class? :) As you can see it is a very versatile pattern and I'm hopefully of filling my class. Know anyone in the Spearfish area who wants to learn how to sew?

PS, I'm linking up with Train to Crazy's

125

Friday, October 18, 2013

Stashbusting Yarn for A Knitted Headwarmer

When I was searching Ravelry for sweater options I ran across some smaller cute chunky yarn projects. When I ran into some sweater questions I decided to stop on it and pick one of the "easy" and "quick" projects... can you feel the sarcasm? :)
In all honesty it was user error but that doesn't make the frustration and row ripping out any less. 
I started with this lovely headband but my yarn was too fuzzy? bulky? poofy? to show the lace pattern so after three attempts I switched to a different more chunky favorable headband pattern. Found HERE!

I thought this large cable might show up very well in my yarn and thankfully I was right. I wanted it to be a wider band than what was there so I increased two stitches, one on each end. I then knit purl knit the three "band" stitches to form a seed stitch.

It was an easy pattern to follow, so easy that I didn't even  mark my rows... so when I picked it back up I didn't know where I was and ended up having to knit and rip several rows until I got myself straightened out. (watching TV while knitting had nothing to do with it either!) On the plus side I now feel I have a much better understanding of how cables are formed.

Photographing it was another battle. 
I'm thankful to have accomplished it! This actually will be a Christmas gift for one of my best friends. She has one of these made from fabric in almost the same shade of blue so I'm hoping she'll enjoy it and it will be useful to her.

Am I even wearing this thing correctly?
Despite all my troubles, which were mostly self inflicted, (but the TV wasn't the problem!) this is a really great little pattern. If you want a quick gift or to practice learning how to do cables before you embark on a bigger project, this is a great project.

So do you knit for other people? I usually don't since it takes me so long and there is so much I don't know about it. This was a small enough thing I thought I would give it a try. When and where do you knit? Any tips on keeping on task while watching TV? :)
Hope you all have a great weekend! Happy Sewing!

Wednesday, October 16, 2013

I Spy A Great Kid's Gift.

I spy with my little eye, a great project for you!

Eye spy bags are perfect toys to whip out when you need a bit of distraction. I wanted to make some that were small enough to throw into your purse. I'm not giving you directions for how I made mine because I think I put them together the hard way, using fabric scraps I already had cut. Melly Sews has a great tutorial on sewing vinyl windows that is much better. You can just ignore the lining and rest of the pouch directions...
Basically all you are doing is sewing two squares, rectangles, whatever shape you want together, you just have to put a vinyl window in first. Here's a couple of my other random thoughts on making these:

  1. Make the bag THEN write the list on the back. This way it doesn't end up bigger than you wanted. Just make sure you use a pen that doesn't need to be heat set. 
  2. Apparently there is a debate on how big a window to use. Keep it small so only a few things can be seen at a time or let it all hang out. I didn't realize this until afterwards. My small windows were sewing oopses.. excuse me, DESIGN FEATURES. 
    Folded on left, full vinyl window on right.
  3. Find LOTS of stuff. I wish I had found more things to put inside. I wish I had put more filler in them too but I was worried about it being too full and heavy. Whatever.... it works.
  4. Don't let anyone tell you this is a good quiet time toy. The filler rattles against the plastic and if you whip this baby out in church, people are going to start looking around for the noise.
Pebbles, has a lot of fun with the first big one I made. She was a young two year old when she discovered it and loves crawling up in your lap and showing you what she's found. You can really draw out the distraction time by asking what it is, what color, what shape, all that good stuff. 

So there it is! Another quickish project for you. I think these would make great stocking stuffers. What do you think?


Ps. Just found this sewalong and am TOTALLY doing this! Just the kick in the pants I need to start my fall sewing. Anyone else in for it?

Bow Neck Blouse Sewalong

Saturday, October 12, 2013

Weather Update and Pinterest Pouch Pattern


Well this is a day late since it decided to rain for over 24 hours along with high winds which knocked our power out AGAIN! Some of the broken trees must have hit the lines. Since everyone was on the ONE line the power company put up, the whole country was out again. Thankfully it got back on about mid morning today. 
The water receded in the night too so we didn't wake up to a washed out road again. I think I'm starting to get cabin fever...
Anyways... on to sewing! I managed to make these before all the bad weather and crazy power outages!


Well I tried another one of those pictorial tutorials on Pinterest. It actually turned out really well and I really like how it gives the pouch instant shape. Just a couple things to take note of.
  1. Be very very VERY careful sewing over the zipper ends. I’m sure you already know this but I HATE breaking needles this way.
  2. The loop in the seam isn’t necessary because of the deep folds on the ends but it does make it easier. 
    Don't they look like tasty candies!
  3. You can line the pouch pretty easily but you must take time to press and topstitch carefully to keep the lining out of the zipper. I lined the big one but not the little ones. Here’s a great lined pouch tutorial it’s just a bit tricker when the fabrics are in one piece instead of two, hence the careful pressing. 
    Left corner shows my not careful pressing.
    I serged the only exposed seam.
  4. I interfaced all the outer fabrics with some lightweight interfacing to give the shapes a little boost. 
  5. This is a GREAT stashbusting project since you can use any square or rectangle piece. I had so much fun using up these random vintage squares I’ve had lying around forever!

Now, I have a confession.. I hope these become Christmas gifts but not for anyone I know. I’ve got a craft show coming up in November and I’m going to throw these out there. If they don’t sell... well everybody knows what they’re getting for Christmas! :)
How's the weather where you live? What's the longest you've gone without electricity? Have you done any stashbusting this month?

Monday, October 7, 2013

SNOW and One Year Anniversary Giveaway

Well I'm back!! Apparently when you lose electricity your phone and internet are run by batteries which run out and leave you completely cut off from the world wide web for over 24 hours until the storm stops and the telephone men can slip and slide their way to the hubs and hook up generators!
(if this is boring you feel free to skip down to the bottom of the post)
Sunday dawned bright and clear and sunny letting us go out and inspect the damage.
Worst October Snowstorm in 100 years. 10 inches to 2 feet. 
In 15 miles of road we counted 100 downed power poles. Thank God for the generator!
So many damaged trees and dead cattle, sheep and horses.

Tiramisu braves the outdoors for the first time in three days.
 Anyways, on to the giveaway. September marked my first year of blogging. I've learned so much, made so many new friends and connections and got to participate in a ton of amazing sewalongs. I also have gotten to run the Stashbusting Sewalong and am so happy to see how it has been helping all of us sew up the fabrics we love.
I wanted to give something back to all of you and I didn't want to have to choose one so I thought I'd share a sneak peek at a project I'm working on. TaDa!

Simply embroidery on the left, heat set crayon on the right.
I really want to see what some applique would look like.

If there's ever a time I could be could be called a nerd it's with words. I love words and don't think good words are used often enough. I've been collecting kawaii images on Pinterest for awhile in hopes of putting together a quilt sometime. Six inch squares alternating between a kawaii shape and solid fabric blocks. When I thought of words my idea was set! What do we want children to BE? I'm working on my drawing skills and coming up with a whole set of Be Kawaii embroidery patterns.
This is my first one. Be Patient

Patience: Waiting without complaining 
Patient : able to remain calm and not become annoyed when waiting for a long time or when dealing with problems or difficult people
*done in a careful way over a long period of time without hurrying  
*bearing pains or trials calmly or without complaint
* manifesting forbearance under provocation or strain 
* not hasty or impetuous
* steadfast despite opposition, difficulty, or adversity (according to Websters)

If there's one thing I've learned this year is to be patient. Starting a business, starting a blog, living life, it all takes patience and what's more patient than a seed? So as thanks for following along with my crazy adventures this past year I'd like to share this with all of you who are interested. If you'd like a copy of my patient kawaii seed embroidery pattern leave me a comment with your email or email me at emsewcrazy (at) yahoo (dot) com.  I'll send you a PDF of my six inch embroidery pattern.  If you do make it up I'd love to see a photo though!

Well the generator is going to get turned off pretty soon so I better get some other things done. I'll see ya all around!

Friday, October 4, 2013

Oh The Weather Outside Is Frightful!

So this wasn't exactly the post I had planned today. I was going to get up and photograph all my selfish sewing projects and show them off. Instead I woke up to wind and icy snow which snapped power poles and dropped lines on the ground. This turned our power off. The power's still off but our neighbor brought over a generator around 4pm so we could heat the house, run water, turn on lights, flush the toilets, get online and enjoy all the other electric pleasures.
Evening view of my basement window. 
 Now before you get to feeling sorry for me or collapse from the shock of it all, I want to say, I had a lovely lazy day. There's something freeing about cut off from technology. No blogging pressure, no Etsy shop listing pressure, no sewing list pressure... the power was off and none of that worked. The family just sat in the living room and kitchen together hanging out and marveling at the storm.
I don't know about you but blizzards outside make it feel like a holiday inside. I read a book, played checkers and battleship with my brother and even dug through some knitting books to find my next project.
Sorry for the crummy photo. It's going to be from one of these very lovely
red tweedy yarns.
I knew I wanted a jacket and it was going to be from one of these red yarns. I'm still learning about gauge or rather what yarns will work for what patterns. Being gifted a yarn stash is lovely but when you're learning its hard to figure out which pattern you have enough yarn for and if that pattern will work with that heavy of yarn... I'm just being confusing.... moving on.

I reallly like this big back cable, I'm not too thrilled about the way it ends in that bum flap panel. The front is really cute too...
pattern
DROPS number 134-55 I think it's called Chocolate passion?
My favorite is this Celtica design. I like the cables and open space mix but I'm wondering if it is too small for the bulky yarn. Will bigger yarn swallow up those cables?
After a phone conference with my Knitting Master Brother I need to knit up the gauge swatches and see which comes out closest to what the pattern says... we'll be out of power for awhile so I think I'll get to working on my winter wool sweaters.
PS. These designs are free on their website. I'm just trying to be quick to conserve power.
Celtica Front
This is their Celtica Back design.

Wednesday, October 2, 2013

October Stashbusting Theme!

Hello My Stashbusters!!
Can you believe we've almost completed our year of stashbusting? We've only got three months left and I don't know about you but I've still got a ways to go. :) Let's talk about October's Theme.

October: Sewing for Others for CHRISTMAS!!
Yes, I said Christmas. Don't hate me. Here's my thinking though, I always have a huge list of things I want to make for everyone and their brother but I always run out of time. Anyone else ever in the same boat? Come on, be honest...
This October take the time to whip out a few gifts for your teachers, the kids, or even that special someone. Or start on that big project you always have to downsize since you didn't start it in time. Whatever you get done will give you less stress closer to the holidays and leave you more time to spend with those you love.
Remember, the themes are always optional as long as sewing from the stash is not.

To keep from getting discouraged it's important to look back and remember what we have accomplished. Specifically what we accomplished in September! If you haven't added your makes to Cindy's link party you still have a bit of time. Remember that there will be voting for the best garment and best toy. Silly little prizes will be given...
Looking back, here's some of my favorite kid makes that showed up in our flickr group.

Ottobre 03/2013-22
Coolest back pockets EVER!
September Stashbusting: Vest, belt, pouch
Pirate Costume! Love costumes!

Oliver + S raglan
Space Invaders!

New Look 0184 outfits
Super Duper Adorable!
There were some other fabulous stash makes that weren't for kids this month but to see them you'll have to check out the Flickr pool yourself.
So how are you feeling? Are you in a sewing slump? Has life been too crazy to sew? I know it's been touch and go for me this month. I'm hoping October will give me some quality sewing time and I'll make a dent in the stash this month.